Thursday, 27 April 2017

Computer Graphics- 23. Fighter Jet Using OpenGL

 FIGHTER JET USING OpenGL


IT IS A COMPUTER GRAPHICS PROJECT MADE USING VISUAL STUDIO. IN THIS PROJECT IT SHOWS ABOUT FIGHTER JET.

Programming in Visual C++ Using OpenGL, Introduces the three-dimensional computer graphics with OpenGL.

In this post I am going to show the OpenGL code on FIGHTER JET and the implementation and demonstration of FIGHTER JET using the computer graphics and OpenGL API.

There are many 2D program in our blog, today we are presenting Fighter Jet CG Programs in C. This cg OpenGL game look like video game. The game have a Fighter jet which moves in all direction and also fires bullets. User have control over the movement of jet and bullet.

Fighter Jet CG Programs in C

In this program the Fighter Jet is drawn with the help of simple line code using GL_LINE_STRIP and GL_LINE_LOOP. The Jet also have shield. The activation also is control by user with keyboard function. 

If the shield flag is turn on, drawshield() function is called. This will then activate shield. The shield is not shaped like cg OpenGL circle but some what similar to it. With sine and cosine functions and GL_LINE_LOOP it get close to circle.

After Jet and Shield, next is bullet. In the Fighter Jet CG Programs in C GL_POINTS is used with for loop function to draw the bullet points. The entry flag set the entry point for bullet firing, allocate the bullet when to fire. The allocBullet function check if bullet is in use.

User Interaction Fighter Jet CG Programs in C

This cg OpenGL program have keyboard interaction. Both alpha keys and navigation keys are allocated to the keyboard functions. 
ESC : Quit
S and s :
C and c : Show and Hide Cursor (More functionality is added by functions)
z and Z : Add 20 point in direction of motion.
f and F : Enter game mode.
l : Exit game mode
P and p : Pause the game
Q and q and Space : Fire bullet from fighter jet.

This cg OpenGL program have many keyboard functions. There are 4 keyboard functions  - key, keyup, special, specialup. 

Key function have the user interaction indicated above in the post. While in the Key function s, S setup the shield flag to one the same is set to keyup. Since different set of windows are created, it set the platform of shield and it's activation.  

The special and specialup function have up, left and right which give the thrust, left and right movement.

All these objects are designed with simple OpenGL graphics objects. Do buy the project and I think you will like this project as well put your comment and let us know what more need to be added in this. Also help by contributing your projects either modified or new, we are going to publish your project on this blog with your name. It is a humble request as I single can't help student reach that much of projects.

""Type your email-id in the comment box and pay INR 400 on 
1). Paytm no. 7795746605   or
2). Paypal id:- paypal.me/abhishekabhi/400inr
for code & send payment details to solutionsbyabhi@gmail.com""

Please Hit the like button and subscribe the channel (subscription is FREE OF COST) and you will get new video notification next time.

Computer Graphics- 22. First Come First Serve Using OpenGL

FIRST COME FIRST SERVE ALGORITHM USING OpenGL


IT IS A COMPUTER GRAPHICS PROJECT MADE USING VISUAL STUDIO. IN THIS PROJECT IT SHOWS ABOUT FIRST COME FIRST SERVE.

Programming in Visual C++ Using OpenGL, Introduces the three-dimensional computer graphics with OpenGL.

In this post I am going to show the OpenGL code on FIRST COME FIRST SERVE and the implementation and demonstration of FIRST COME FIRST SERVE using the computer graphics and OpenGL API.

First Come First Serve Algorithm is OS based Computer graphics Project. This Project as name suggest demonstrate the working of First Come First Serve Algorithm or FCFS Algorithm.

About First Come First Serve Algorithm

The first come first serve (fcfs) algorithm is one of the scheduling algorithms for Process in Operating System. It has the following algorithm - 
  • In FCFS the process is executed on first come, first serve basis.
  • This algorithm is easy to learn, understand and implement.
  • The performance of this scheduling algorithm is poor as average wait time is high.
Terminology

Arrival Time : Time of Arrival for Process.
Execute Time :  Time taken for execution. 
Waiting Time : Time to wait for process it’s execution.
Average Wait Time : Total waiting time/No of Processes.

Instruction to execute Program

To execute this program - run the program with CTR+F5(in windows). First page will have instruction written on it. Press E or e to run the computer graphics project with default values. To run with your own values, give the inputs. Like in our case - press 4 first to give no of process. Then input 2, 3, 6, 7 for arrival time. Next input the execution time 2, 4, 5, 5. 

We have wait times for each as in the table  -
ProcessWait TimeExecution Time
102
214
325
465
Average Wait time = 0+1+2+6/4=9/4=2.25

You easily understand and demonstrate the concept in OS - First Come First Serve Algorithm. With learning from this project do your own the other scheduling algorithms projects on OpenGL.

All these objects are designed with simple OpenGL graphics objects. Do buy the project and I think you will like this project as well put your comment and let us know what more need to be added in this. Also help by contributing your projects either modified or new, we are going to publish your project on this blog with your name. It is a humble request as I single can't help student reach that much of projects.

""Type your email-id in the comment box and pay INR 400 on 
1). Paytm no. 7795746605   or
2). Paypal id:- paypal.me/abhishekabhi/400inr
for code & send payment details to solutionsbyabhi@gmail.com""

Please Hit the like button and subscribe the channel (subscription is FREE OF COST) and you will get new video notification next time.

Computer Graphics- 21. Moving Bezire Curve Using OpenGL

Moving Bezier Curves Using OpenGL

T IS A COMPUTER GRAPHICS PROJECT MADE USING VISUAL STUDIO. IN THIS PROJECT IT SHOWS ABOUT  BEZIER CURVE.

Programming in Visual C++ Using OpenGL, Introduces the three-dimensional computer graphics with OpenGL.

In this post I am going to show the OpenGL code on BEZIER CURVE and the implementation and demonstration of BEZIER CURVE using the computer graphics and OpenGL API.

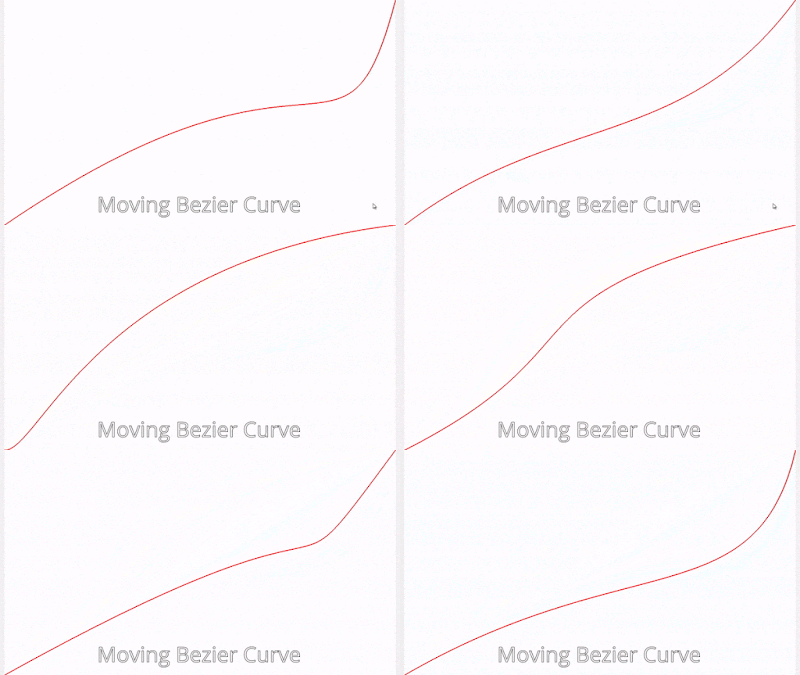
Below gif will demo the out put and show Moving Bézier curve.


A curve is collection of set of points which are not in a straight line. They exist in 2d as well as 3d space. Bézier curves are parametric curves which can be generate with some set of points called as control points. Bézier curves are of different degree - linear curves, quadratic curve, cubic curve and high order curve. Following image will show the mathematical representation of Bézier curves -


In our example we will use simple Bézier curves, and give motion to them using two control points.

First we define the global variables which we can use in more than one set of function or methods. We have four set of control points, one each at end of curve and two in the middle. Using the middle control points we will give the curve a movement to change their position in 2d plane.
int bzco[4][2]={{0,0},{99,201},{204,49},{320,300}},c[4],n=3;
You can experiments with the bzco and choose the specific points for motion.

Next is to draw bezier curve, for which we need to define the curve center points. Firs of all we will define a function that will compute the points of the curve. This functions is very important for drawing bezier curves in opengl.

void bezierCoefficients(int n,int *c)
{
 int k,i;
 for(k=0;k<=n;k++)
 {
  c[k]=1;
  for(i=n;i>=k+1;i--)
  c[k]*=i;
  for(i=n-k;i>=2;i--)
   c[k]/=i;

 }
}
In display function we will call the above function and use the GL_LINE_STRIP in loop to develop the curve. The array of x, y coefficients will help in containing value for control and end points. Size of points is also defined using the glPointSize and gluOrtho2D to certain x, y values which define the curve path.

We have finished drawing Bézier curve but this post is about Moving Bézier curves Program. Hence we need to define a function called motion(), which will give movement to the curve. Simple logic we use to determine the extent of movement is the x, y coefficient point of 2d plane. We will set the value to which curve can move and then came down from there. For this we will use the array which we have declared as global variable.
void motion(void)
{
 bzco[1][0]+=s1x;
 bzco[1][1]+=s1y;
 bzco[2][0]+=s2x;
 bzco[2][1]+=s2y;
if(bzco[1][0]<0 bzco="">320)
{
 s1x=-s1x;
}
if(bzco[1][1]<0 bzco="">300)
{
 s1y=-s1y;
}
if(bzco[2][0]<0 bzco="">320)
{
 s2x=-s2x;
}
if(bzco[2][1]<0 bzco="">300)
{
 s2y=-s2y;
}
glutPostRedisplay();
}
In the above code you can see that first we add the number(distance) to the array and then negate it. So, logic is to first add the value to coefficient to go up and bring them down. You can see we have chosen 300, 320 two different control points. You all can experiment with these points as well and see the the magic yourselves. The glutPostRedisplay(); repeat drawing of objects on screen with call back to main function, hence will repeat the same.

All these objects are designed with simple OpenGL graphics objects. Do buy the project and I think you will like this project as well put your comment and let us know what more need to be added in this. Also help by contributing your projects either modified or new, we are going to publish your project on this blog with your name. It is a humble request as I single hand can't help student reach that much of projects.

""Type your email-id in the comment box and pay INR 400 on 
1). Paytm no. 7795746605   or
2). Paypal id:- paypal.me/abhishekabhi/400inr
for code & send payment details to solutionsbyabhi@gmail.com""

Please Hit the like button and subscribe the channel (subscription is FREE OF COST) and you will get new video notification next time.

Computer Graphics- 20. Linked List Using OpenGL

Linked List using OpenGL


IT IS A COMPUTER GRAPHICS PROJECT MADE USING VISUAL STUDIO. IN THIS PROJECT IT SHOWS ABOUT LINKED LIST.

Programming in Visual C++ Using OpenGL, Introduces the three-dimensional computer graphics with OpenGL.

In this post I am going to show the OpenGL code on LINKED LIST and the implementation and demonstration of LINKED LIST using the computer graphics and OpenGL API.

C is a general-purpose, imperative computer programming language. C Programming is vast with so many concept behind it (operators, loops, functions, single and double dimensional arrays, performing operations on strings, filespointers etc.). One of the key concept which we learn is about Linked List.

Linked list in c the concept which not many of us grab properly. It is very important programming concept in C. There are many Operation in the Linked list, before going to learn about them, I want to tell you we are not giving concept of Linked list in c,  but Computer Graphics Program.  Yes we are using the C language as the primary language to write the program but here we deal with graphics programming and not c programming. You must know about the Linked List in C which is per-assumed here.  The program uses the OpenGL API to render graphics. Hence it is basically a C or C++ Computer Graphics Program using OpenGL.

Various operations on Singly Linked list in C

Singly Linked list is a linear data structure with many operations can be done on the nodes unlike the array in C. Various operations that can be done are listed below -
  1. Creation
  2. Insert at starting
  3. Insert at position(user's choice)
  4. Insert at end
  5. Delete 1st node
  6. Delete last node
  7. Delete at position(user's choice)
  8. Display 
The source code of the C program to illustrate the operations of singly linked list. Try to learn it first in C then go for graphics program.


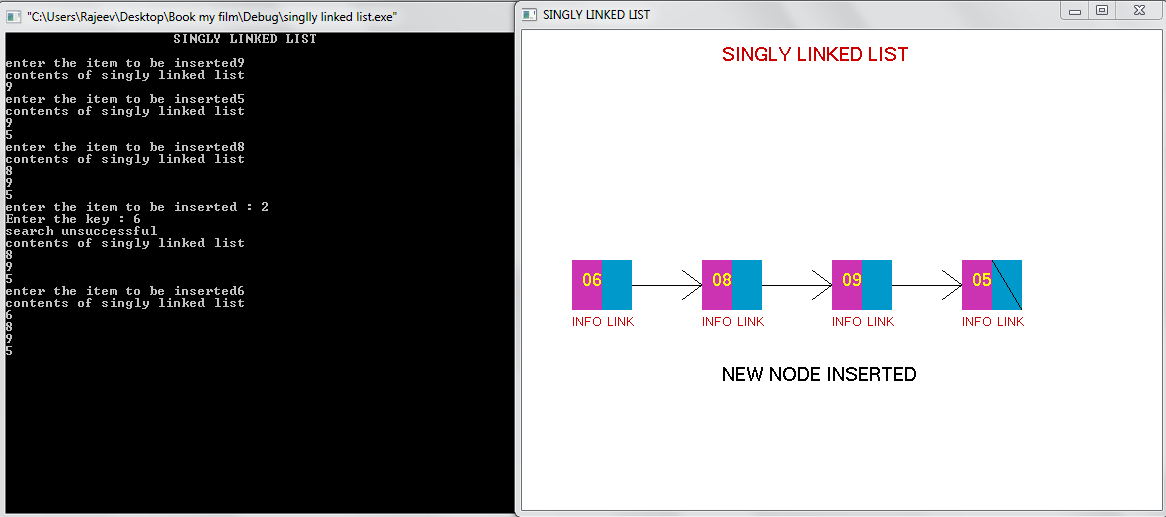
This Computer Graphics Program is operated via two windows as seen in the image. With one we insert the data while graphics is shown in other window. There is some problem in the program so we need to keep patience in input the data to program. Everything is working perfect if done calmly, while in some PC with less graphics, it may stop working.

All these objects are designed with simple OpenGL graphics objects. Do buy the project and I think you will like this project as well put your comment and let us know what more need to be added in this. Also help by contributing your projects either modified or new, we are going to publish your project on this blog with your name.It is a humble request as I single hand can't help student reach that much of projects.

""Type your email-id in the comment box and pay INR 400 on 
1). Paytm no. 7795746605   or
2). Paypal id:- paypal.me/abhishekabhi/400inr
for code & send payment details to solutionsbyabhi@gmail.com""


Please Hit the like button and subscribe the channel (subscription is FREE OF COST) and you will get new video notification next time.

Computer Graphics- 19. Client Server USING OpenGL

Client Server USING OpenGL


IT IS A COMPUTER GRAPHICS PROJECT MADE USING VISUAL STUDIO. IN THIS PROJECT IT SHOWS ABOUT CLIENT AND SERVER.

Programming in Visual C++ Using OpenGL, Introduces the three-dimensional computer graphics with OpenGL.

In this post I am going to show the OpenGL code on CLIENT AND SERVER and the implementation and demonstration of CLIENT AND SERVER using the computer graphics and OpenGL API.

The Client Server Projects on computer graphics is a networking based project. This vtu 6th sem project indicates the working of client and server request and response. This Project is submitted to us by students who has presented this as their  CG Lab Project in College. In similar way if you have projects you can submit it us. They don't want to have the name but you can have project published with your name. Became either author or just get a coutsery.


What we have in this projects?
We have a client  and a server. The client give the command to server, it then get the response of that command from server. As the response is received by the client it then send the data to server. This is the main function of this project.

There are another function of the server - storing the data which we seen earlier and giving the data on request. So we can retrieve the stored data with retrieve menu. Store the data with store menu. List is another function. Major interactions for the VTU 6th Sem Project are listed below.

Mouse Interaction

There are 5 major Menu added to this project via mouse click. You can get the menu via right clicking!

1. START - Simply proceed the data with request and response.
2. START 1:RETRIVE - It helps retrieve the stored data from the server.
3. START 2:STORE -  It store the data to the server.
4. START 3:LIST - Listed the data to and from the server.
5. EXIT - Quit from the server.

All these objects are designed with simple OpenGL graphics objects. Do buy the project and I think you will like this project as well put your comment and let us know what more need to be added in this. Also help by contributing your projects either modified or new, we are going to publish your project on this blog with your name. It is a humble request as I single hand can't help student reach that much of projects.

""Type your email-id in the comment box and pay INR 400 on 
1). Paytm no. 7795746605   or
2). Paypal id:- paypal.me/abhishekabhi/400inr
for code & send payment details to solutionsbyabhi@gmail.com""

Please Hit the like button and subscribe the channel (subscription is FREE OF COST) and you will get new video notification next time.

Computer Graphics- 18. TRAFFIC SIGNAL USING OpenGL

Traffic signal Using OpenGL


IT IS A COMPUTER GRAPHICS PROJECT MADE USING VISUAL STUDIO. IN THIS PROJECT IT SHOWS ABOUT TRAFFIC SIGNAL.

Programming in Visual C++ Using OpenGL, Introduces the three-dimensional computer graphics with OpenGL.

In this post I am going to show the OpenGL code on TRAFFIC SIGNAL and the implementation and demonstration of TRAFFIC SIGNAL using the computer graphics and OpenGL API.
 
Descriptions : As we know, the traffic signals direct the flow of traffic with the exemption of signals with turning arrows which should be compulsory in accord with each other.Traffic signals helps us to drive our vehicles in a safer manner lowering the risk of accidents, if properly followed.

In this Project simulation, we are implementing  Traffic Signal. We have three lights in the signal Red , Green and Orange. Each light have some meaning . Red means stop , Green means go, Orange means ready to go. 

Same method we implemented in our project which used in real life .We have used this traffic signal in a cross road to avoid misshapening. When there is green signal it means vehicle can move or run on the road but if this green signal turnoff  and the red signal is turn on then its indicate the driver to stop his vehicle and same time signal allows some other side vehicle to cross the road. But if the vehicle is in the middle of cross or vehicle have cross the signal then there is no meaning of red light for the driver. When we press button R then red light will glow and all vehicles are stop n when we press Y button then  yellow light will glow and all vehicles ready to go .When  we press button G  green light will glow and then vehicle start  moving.  


All these objects are designed with simple OpenGL graphics objects. Do buy the project and I think you will like this project as well put your comment and let us know what more need to be added in this. Also help by contributing your projects either modified or new, we are going to publish your project on this blog with your name. It is a humble request as I single hand can't help student reach that much of projects.

""Type your email-id in the comment box and pay INR 400 on 
1). Paytm no. 7795746605   or
2). Paypal id:- paypal.me/abhishekabhi/400inr
for code & send payment details to solutionsbyabhi@gmail.com""

Please Hit the like button and subscribe the channel (subscription is FREE OF COST) and you will get new video notification next time.